You’d really like to capture those moments on Christmas morning of the kids opening their presents. You’d even like to have an angelic image of each child in a calm moment in front of the tree. Sigh. Such a big challenge.

I’m here to coach you on using your smart phone’s camera. Phones are perfect for spontaneous shots and you can make your shots better with these simple tips.
This is Part 1 of 2. Hang in there for this part is the hard one- all technical. But you must know how to work your phone camera before you can do the cool creative part of composition, posing, and lighting which we’ll cover next time.
Settings for indoor phone photos:
1. Clean the lens on your phone. Of course it’s smudged!
2. Invoke phone Camera by tapping power button twice
3. Across the top of the screen are icons. Adjust them as follows:
4. Turn HDR on
5. Turn Grid on. I prefer Golden Ratio, but any of the grids help you hold your phone level and make good compositions
6. Turn on Auto for light conditions. For warmer skin tones, turn on Sunny Or choose Tungsten for indoor artificial light from light bulbs. (If you have fluorescent lighting choose Fluorescent)
7. Turn Flash off
8. Hold phone straight up and down- on a 90 degree plane in front of subject for true perspective. Tilt the phone if you want to distort perspective, for instance to put emphasis on the eyes, and let the body be out of focus.
9. Move closer to subject rather than zooming for much crisper images
Why turning off flash is a good idea:
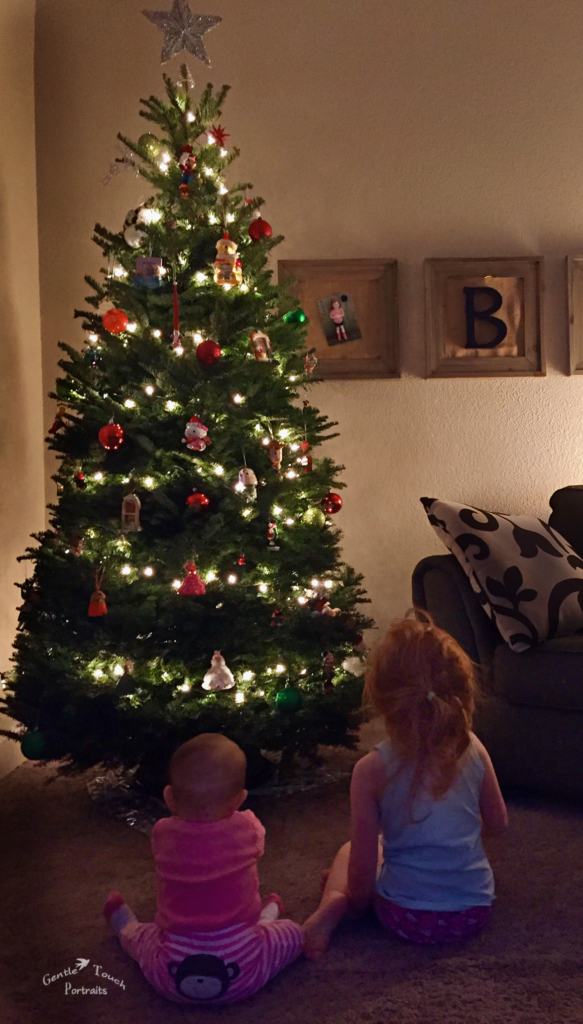
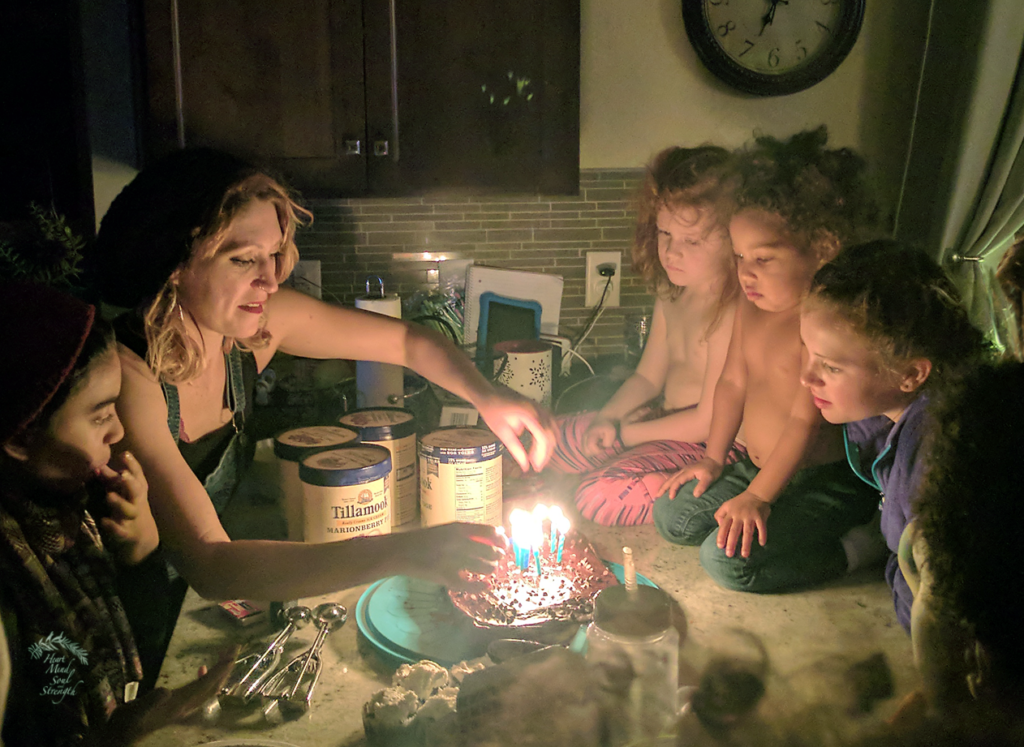
Without  flash you can capture the true atmosphere of your image. Flash blasts all things equally and destroys the ambience. Note photo of the children in front of the tree. Flash would have ruined this true-to-life rendition of a dark room with Christmas lights. Flash overpowers other light. Note photo with the birthday candles. The room lights were off and phone flash was off so candles and their soft light illuminated the subjects.
For non-moving subjects:
Tap the screen over the object you want in focus, then hold 1,2,3 till AE/AF Lock appears on screen
Adjust exposure with the sun icon slider or just moving finger up or down on screen anywhere. Up for brighter, down for darker.
Adjust exposure so highlights have some detail and aren’t blown out, blank white blobs, and deep shadows are true black. May need to actually reduce exposure in a dark room!
Then you may recompose putting the subject where you want it in the frame. Keep phone same distance from subject as it was when you set AE/AF.
Use ear buds to trigger shutter when phone is on a tripod. Any earbuds that have in-cord volume control will release shutter by tapping volume up or down.
For moving objects, i.e. Children!
~Tap power button twice to invoke phone camera
~Same settings as above- Clean your lens, HDR on, grid on, Auto for window light or Tungsten for light bulbs, flash off, Portrait Mode if you have an iPhone for sitting children (so the background will be blurry if your subject is within 8 feet of phone)
~Take a test shot before the action starts. Practice being fast at moving the Lighter/Darker sun icon in your room lighting
~When the action starts, get in close. Move phone closer instead of zooming for sharper images
~Tap the screen over child’s face to tell phone where to focus
~If you have time, move the Lighter/Darker slider for best exposure
 ~Tap screen or volume button on phone to take photo

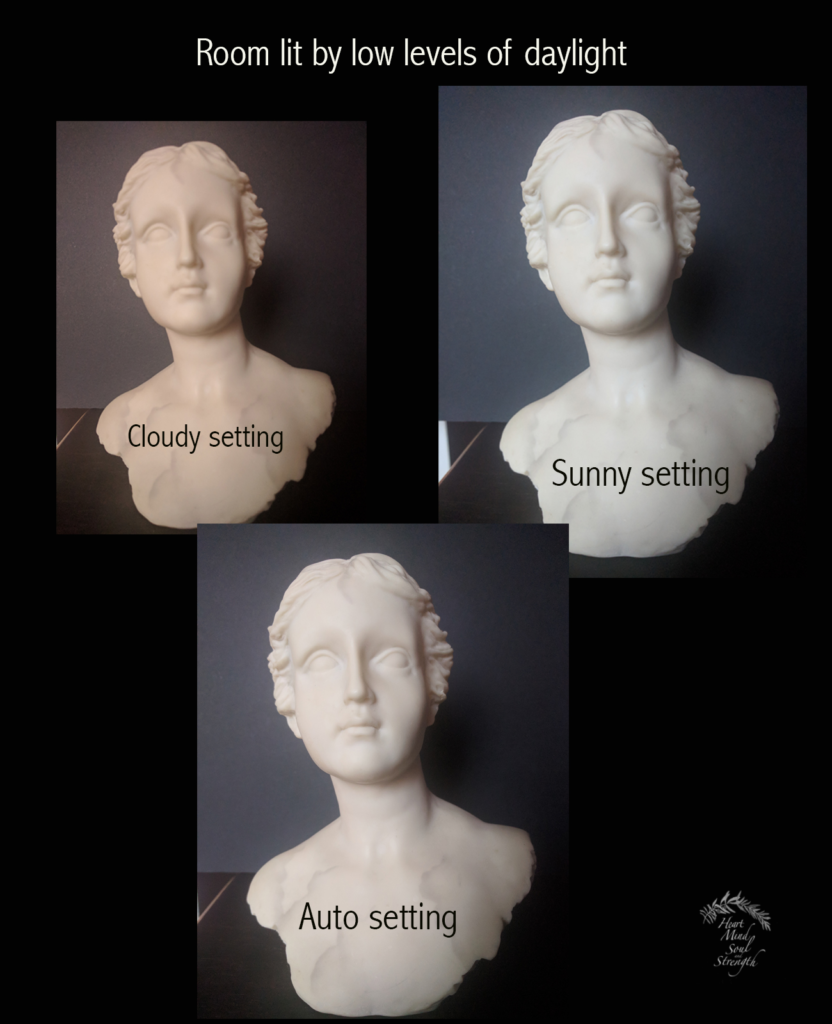
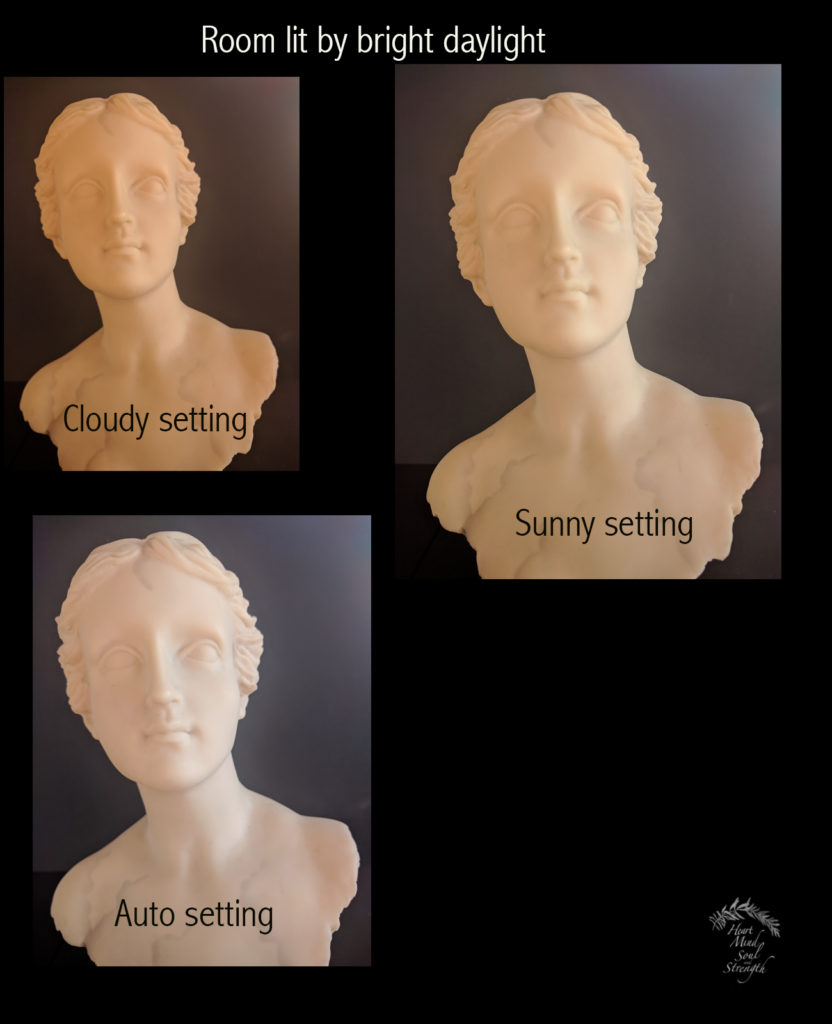
Cloudy setting adds lots of warmth. Sunny setting warms a little. Auto setting indoors on Android is actually pleasing. If you feel your skin tones are too cool on Auto, try Cloudy or Sunny settings.
About apps for capturing images with you in it. Sometimes I’d like to be present in family photos. But I’m usually behind the lens capturing family events. I spent the better part of a day searching for an app to time multiple still shots on intervals so I could get in front of the camera. I installed multiple apps and tried to get them to export as single frame JPEGs, but I could only get video output. I know there’s a way to slow the speed from 30x to1x, but I wasn’t savvy enough to make that happen. I don’t want videos of everything. I just wanted my phone to take multiple shots and then let me choose which frames to keep. Seems to be a tall order. Sigh. Any input from someone with more tech ability than me would be appreciated.
Hyperlapse free from Instagram for iOS or Microsoft Hyperlapse for Android are options for doing videos remotely. PS You’ll need a tripod to hold your phone. (Or some hair rubber bands to secure your phone to something stable.)
Apps for more control while shooting
iOS devices only
Camera + app ($3.) For iOS devices only https://itunes.apple.com/us/app/camera+/id329670577?mt=8 None as good for Android
Cortex for low light shooting ($3.) https://itunes.apple.com/us/app/cortex-camera/id517488939?mt=8&ign-mpt=uo%3D8
Apps for post processing for both iOS and Android
VSCO Seems to be the app of choice for fixing/enhancing phone images. Also has camera controls while shooting. Tutorial here https://iphonephotographyschool.com/vsco/ Free with option to buy additional filters. Controllable and subtle filters.
Snapseed for fixing/enhancing and also recommended by many. Free
Tripod for smart phones
https://www.bhphotovideo.com/c/product/1321823-REG/joby_jb01491_griptight_one_gp_stand.html
https://www.bhphotovideo.com/c/product/735493-REG/Joby_GP10_01AM_Gorillapod_Video.html- I want to get this one for $23.
This article explains all the models available at BandH Photo. I have bought from B and H Photo for years. Their customer service tech support is outstanding. Never been disappointed with their products. https://www.bhphotovideo.com/explora/photography/hands-review/cool-collection-tiny-tripods-and-ingenious-supports
Helpful Tutorials
https://www.youtube.com/watch?v=M18ojRd0uVA
https://www.youtube.com/watch?v=cyj_Hmz1_L4